In this article, we will introduce KG316T digital timer setting instructions.
The KG316T is a digital programmable time switch composed of a precise 8 bits microprocessor and several electronic circuits. It can control the opening and closing of various appliances in a cycle of days or weeks. The time setting ranges from 1 minute to 168 hours, 1-16 groups can be set per day. One-time setting is effective for a long time.
It is suitable for automatic control of various electrical appliances and household appliances. Especially, it will be used as a street light timer switch to save electricity and money.
The output current can be 10-30A, which can normally control electrical appliances with 2200W to higher power. If combining with miniature circuit breaker and contactor, it can control various other high-power equipment.
Now let’s start the introduction of the KG316T 6 steps setting instructions:
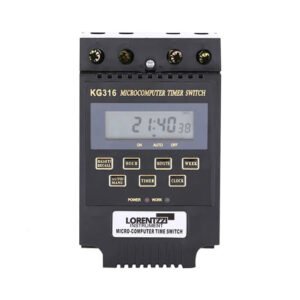
Knowing the KG316T digital timer operation interface
There are 7 soft buttons on this KG316T switch, they are “RESET/RECAL”, “HOUR”, “MINUTE”, “WEEK”, “AUTO/MANU”, “TIMER” and “CLOCK”.

Step 1-Unlock KG316T digital timer swith
The first step is to see how to unlock the time control switch in the figure below. Press the “RESET/RECAL” button 4 times in a row to unlock it. If there is no operation after 15 seconds, this time switch will be automatically locked.
Step 2-Set the KG316T digital timer switch present time
Press the “Clock” button once to enter into the time setting of the KG316T. The setting here is the setting of the current time, not the timing setting. We need to keep this timer time consistent with the current time.

Step 3-Set the KG316T digital timer switching-on time
In the unlocked state, press the “Clock” button of the time control switch, and the display will show “1 ON”, which means the first switching on time point. At this time, we can set the minute, hour and week when the timer starts working.
Step 4-Set the KG316T digital timer switching-off time
After we set “1 ON”, press “Clock” button again, then “1 OFF” will appear, and we can set the swtching off time in hour, minute and week.

Step 5-Set the KG316T digital timer remaining on and off times
Continue to press the “Clock” button, the screen will continue to display ”2 ON”, “2 OFF” until “16 ON” and “16 OFF”. If you need to set multiple time periods, the setting process is the same as above.
Step 6-Save the set parameters and return to the main interface
Press the “Clock” button after the timing setting is completed. At this time, the time switch will display the time. The displayed time is the actual time. The set time is the time we set. The two are different. If you do not press the “Clock” button, after 30 seconds, it will automatically switch to the present time interface.

Different Wiring digrams of KG316T digital timer switch
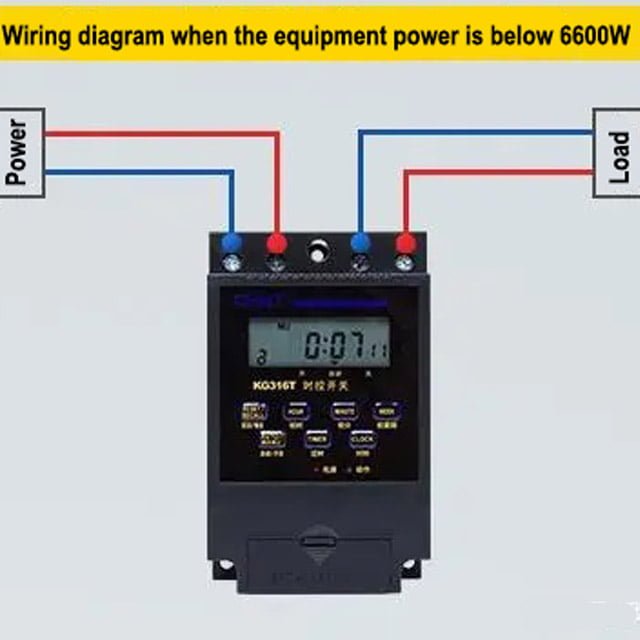
KG316T control the load directly: Pay attention to distinguish the neutral line and live line when wiring it. When the load equipment rated power is below 6600W, we can use the KG316T to directly control the load. Firstly, we shall make the electricity go through a 2-pole miniature circuit breaker as the circuit circuit breaker will protect us from electric shock harm. Then the live wire enters the KG316T input terminal marked with “进” in Chinese, and the neutral line need to connect to terminal marked with sysmbol “T”. The below wiring digram will make it more easier to understand:
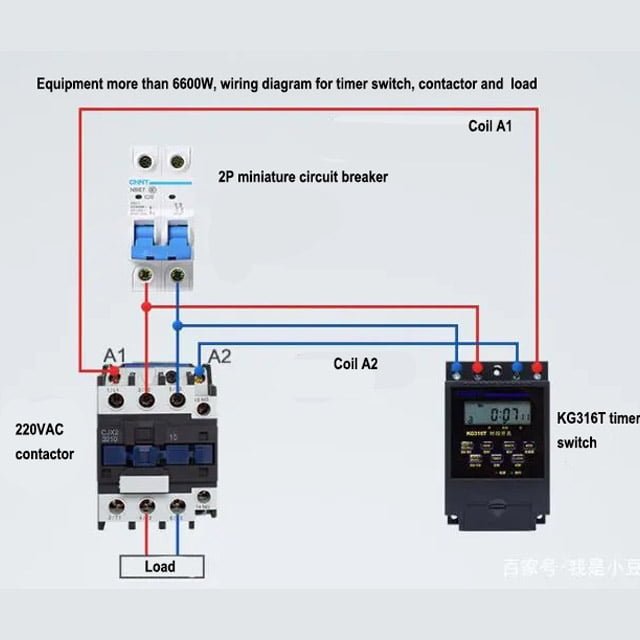
KG316T controls 220VAC contactor: when the load is greater than 6600W, we can use the KG316T with contactor to indirectly control the single phase loads.
Wiring steps: firstly, we shall provide power to the KG316T timer switch and 220VAC contactor. Please wire the live line and neutral line from miniature circuit breaker to the contactor and timer in parallel accordingly. The KG316T output should wire to the contactor “A1” and “A2” terminals seperately.
Operation: When KG316T reaches the time we set, its output terminal will turn on, so the contactor control part is closed, the main circuit will be closed as well. Then the load starts to work. Once the timer reaches to its off time point, the timer stops working, the same goes for the contactor.
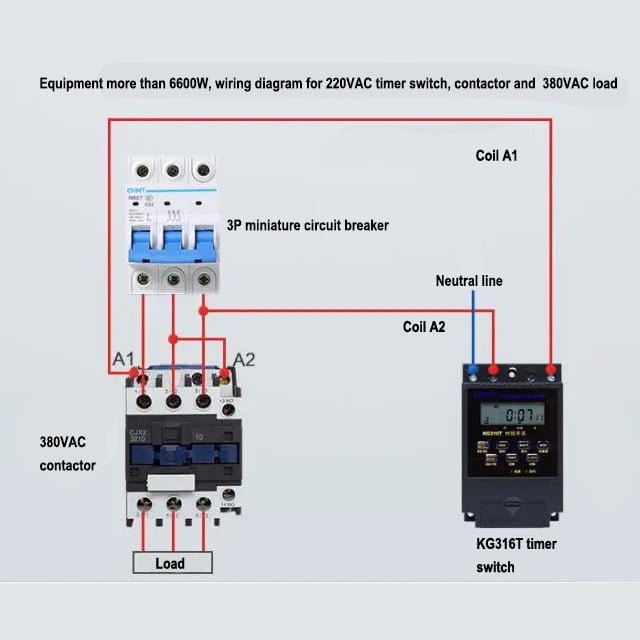
KG316T controls the 380 contactor: three wires come out of the circuit breaker, enter the main contact L1-L2-L3 of the contactor, and T1-T2-T3 go out of the contactor and enter the electrical equipment. It should be noted here that the KG316T is 220V, so we need to provide a 220VAC voltage to it. The output termials of the KG316T need to wire to the A1 and A2 terminals of the 380VAC contactor. Same as the 220VAC one, once the timer turn on, the load will turn on, once the it turn off, the load will be off as well.
Conclusion:
Here above are the 6 steps for digital timer setting instructions of KG316T digital timer, and how to wire it with the load and contactors.
If you have questions, please send your questions to shonxu@lorentzzi.com, we will provide our solutions as soon as possible.